Hey everyone!
With the last update I talked about my process for designing and modeling the enemies for Arbiter. This time around, I’ll be covering my animation process and how I went about animating all ~17 core enemies for the game. That many enemies requires a lot of animation, so I’m also gonna talk about the steps I took to substantially lessen that workload.
Arbiter’s a pretty short game, so I want to be able to regularly introduce new enemies at a pace that keeps things interesting. ~20 enemies suited that purpose for me, so that’s the number I worked around. In creating the game by myself, how I allocate my time work-wise is really important, so generally my approach is to work on things in bulk one job at a time. First that was sketching all the enemies, then it was modeling them, and now it’s animating them.
Before I could get to animation, I had to start by rigging each enemy one by one. I decided to use 3ds Max’s Character Animation Toolkit (AKA CAT) as my weapon of choice as it allows for some really good animation retargeting. What that basically means is that I’d be able to reuse animations between enemies as something of a baseline to build upon. With that, I made a very generic base rig that could be adjusted to fit all enemies however they needed.
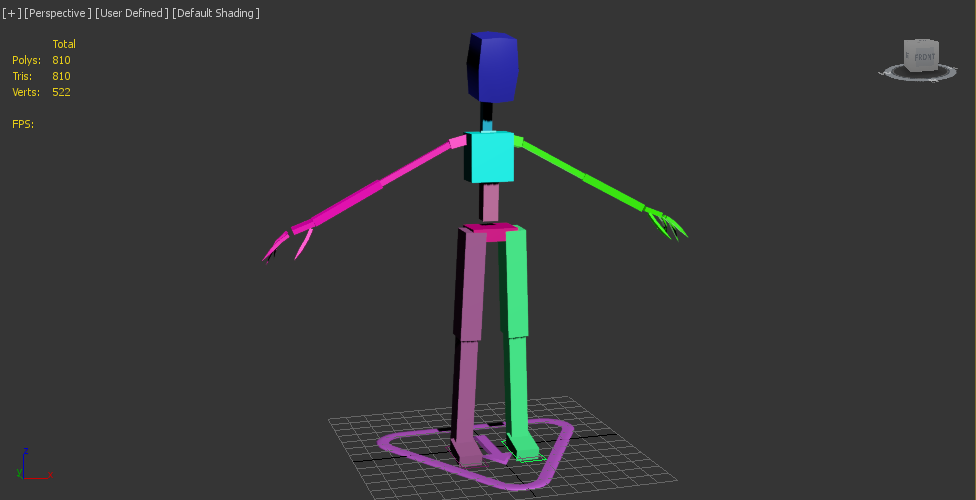
The rig would change pretty drastically based on the enemy, but by starting with the same framework I knew that the animations would retarget as best they could. Obviously an enemy with squid legs won’t inherit a run cycle perfectly, but the torso, arms, and head will all translate just fine. There’s always gonna be cleanup to do no matter what the rig is, but the time it saves beats having to animate every single enemy individually. Rigging all of the enemies took around 1.5~ months total.
One of CAT’s best features is being able to simply build on top of the rig you’ve got. So for example, I could simply select the head bone and create a tail from it, and it would place a tail there. I could then create another tail from the head and make them symmetrical. This process made creating complex rigs incredibly easy and allowed for very clean retargeting, regardless of how complex one rig was over another.
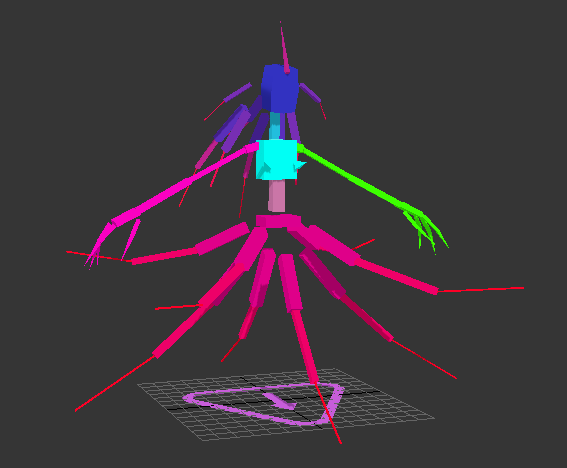
Witch Rig – Built from Base
I then worked out the standard animations that every single enemy will need, as well as how long (in frames) I want each animation to be. This is based off of the enemies I made for the demo, and adjusted to work with my new design principles. Enemies of course have unique animations when it comes to their abilities and special interactions (about 3+ each), but they all share the same core. These core or “standard” animations include:
STANDARD ANIMATIONS
- Idle [~]
- Run [~]
- Fall [100F]
- Land [30F]
- Hit Land [60F]
- Hit Air [75F]
- Hit Break [100F]
- Hit Launched [30F]
- Hit Launched Loop [7F]
- Hit Smashed [60F]
Once I animated the first enemy, I could start using its animations as a retargeting base to apply to the other enemies. From there I would personalize them and cleanup whatever oddities the interpolation may have caused. Usually I have to clean up things like hands, root position, and apply physics to any tails/hair. I also have to make sure it blends back into the new enemy’s default animations, like their Idle or Falling pose. Here’s an example of what animations look like before and after cleanup:
While the retargeting looks pretty good, there’s still a lot of little things that have to be cleaned up. Thankfully, the majority of Arby’s enemies are humanoids, so it all went pretty smoothly. In most cases I was able to transfer animations between enemies no problem, though the amount of cleanup varied based on the rigs. Sometimes it’d be as simple as personalizing an enemy, but for others I’d have to re-animate the legs or torso completely because it didn’t fit the receiving enemy’s rig or style.
That being said, for the really different enemies (things like quadrupeds or gorilla squid monsters) I would have to animate them completely from scratch. These enemies were a little too different, even for CAT, so the animations wouldn’t transfer onto them properly. That would always take a little more work, but those enemies end up feeling a lot more unique as a result. Thankfully (again), there were very few of these enemies so I didn’t have to spend too much time animating from scratch.

Multiply that process by about ~17 and you have my animation workflow! I also export everything into Unity when I’m done just to make sure it looks good in game before moving onto the next enemy. All in all the animation process took about as long as rigging at around ~2 months. It’s been a pretty quick process all things considered, and now that I’m done I’ve got an entire library of retargetable animations for future enemies, so it’ll only get faster.
Speaking of which, there are still a few enemies I’ll be adding later, but those (along with the bosses) will be made in secret as they’re fairly relevant to the plot. Some other enemies include a few additional commissions and the Backer enemies from the Kickstarter. With all of those in mind, I think I’ll do another (much smaller) batch of enemies when I get to the bosses later on. I’m a generalist first, but animation is probably the work I have the most fun doing, so while I’ll be taking a break to focus on other aspects of development, I look forward to getting back to it for the remaining enemies, bosses, and human characters.
Anyways, thanks for reading! Apologies these updates roll out so slowly, but I only like to cover large tasks that I’ve finished, so expect the next update in a few months or so. My next goal is to get going on some level design (which is comparatively probably my weakest skill), so I’ll be doing a lot of research and development to get a better understanding of the process. If you’d like to see more regular updates, you can follow me on Twitter or join the Arbiter Discord.
Cheers!


